To clean a dog’s ears safely at home, use a veterinarian-recommended ear-cleaning solution, massage only the base of the ear, let your dog shake, and wipe away loosened debris without inserting anything deep into the canal. Stop if the ear is painful, red, swollen, bleeding, or strongly odorous, because those signs may indicate an infection or another problem that needs veterinary assessment.
Routine ear cleaning is useful for some dogs, especially those that swim often or have recurring buildup. It is not necessary for every dog, and cleaning healthy ears too frequently can cause irritation. This guide will help you decide whether cleaning is appropriate, prepare calmly, complete the process, and recognize when home care is not the right next step.
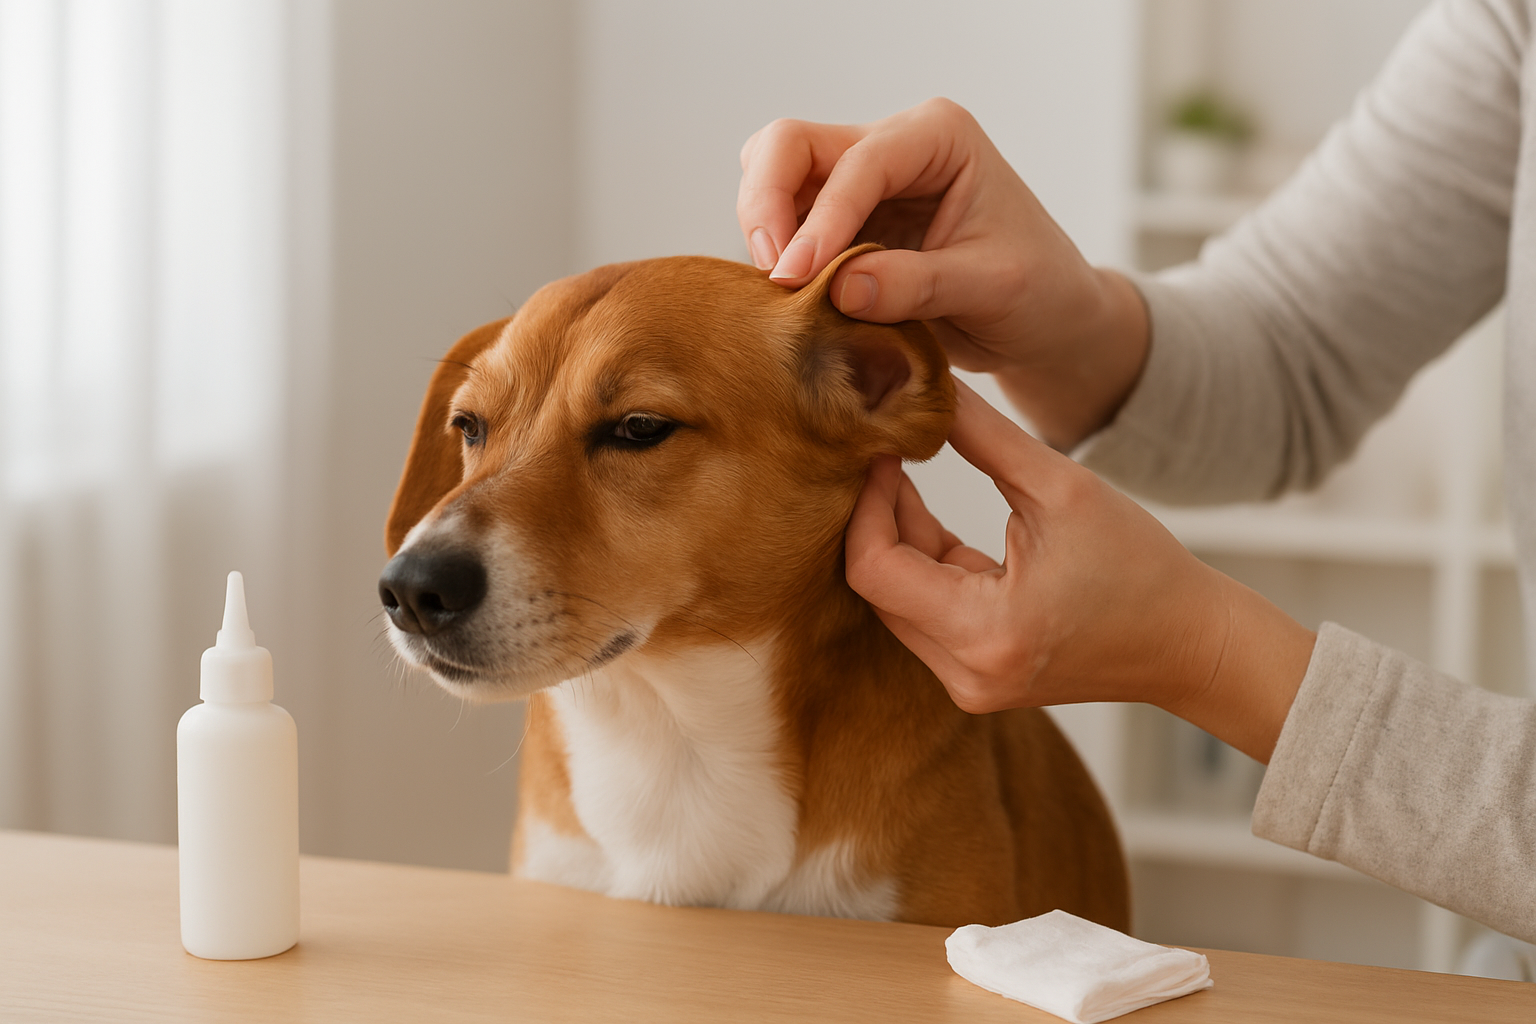
1. Decide whether the ear actually needs cleaning
Begin with a visual and smell check rather than following a fixed calendar. A healthy ear is generally comfortable to touch, not noticeably swollen, and free from a strong unpleasant odor. A small amount of wax can be normal and does not automatically mean the ear needs a thorough cleaning.
Gently lift the ear flap and compare both ears. Look for changes such as excess wax, dampness, dirt around the opening, or debris after swimming. If your dog pulls away, cries, scratches constantly, or seems uncomfortable when you touch the ear, do not continue with routine cleaning.
| What to look for | Likely next action | Warning sign |
|---|---|---|
| Small amount of light wax; no odor; dog is comfortable | Clean only if debris is visible or your veterinarian has recommended it | Wax is rapidly increasing or returning repeatedly |
| Moisture or loose dirt after swimming | Use a vet-approved cleaner or drying product as directed | Persistent dampness, discharge, or worsening odor |
| Redness, swelling, strong odor, dark or pus-like discharge | Arrange a veterinary examination | Pain, bleeding, head tilt, or balance problems |
Ear inflammation can be linked to allergies, parasites, foreign material, bacteria, or yeast. Cleaning alone will not identify or treat the underlying cause, so repeated problems deserve a proper examination. Merck Veterinary Manual explains common signs of canine ear infections and why the cause matters.
2. Gather the right supplies before you start
Ear cleaning is easier when you do not need to leave your dog halfway through the process. Choose a quiet, easy-to-clean area and prepare:
- A veterinary ear-cleaning solution made for dogs
- Cotton balls or soft gauze
- A clean towel for wiping the face and protecting nearby surfaces
- Small treats your dog already enjoys
- A second person if your dog needs calm support
Ask your veterinarian which cleaner is suitable if your dog has a history of ear disease, allergies, a damaged eardrum, or prescribed medication. Some products are designed for wax, while others are intended for maintenance or moisture control. Do not substitute a human ear product unless your veterinarian specifically approves it.
Avoid cotton-tipped swabs inside the ear canal. They can push debris farther inward or injure delicate tissue. Do not use hydrogen peroxide, alcohol, essential oils, vinegar mixtures, or other homemade remedies; irritated or infected ears may become more painful when exposed to them. The VCA ear-cleaning instructions also caution that over-cleaning can irritate the canal.
3. Make the process comfortable and predictable
If your dog is unfamiliar with ear cleaning, separate training from the actual cleaning session. Touch the ear flap briefly, give a treat, and stop. Repeat later, gradually progressing to lifting the flap, showing the bottle, and touching the area around the opening.
Do not restrain your dog forcefully for a routine cleaning. A worried dog may struggle suddenly, which increases the risk of injury. If your dog becomes frightened, pause and try again another day with shorter practice sessions. You can also ask a veterinary professional to demonstrate the technique.
4. Clean the ear using a gentle sequence
Step 1: Position the ear
Have your dog sit or stand on a non-slip surface. Lift the ear flap upward and away from the head so you can see the opening clearly. Keep the bottle outside the ear and avoid touching its tip to the skin, because contact can transfer bacteria to the product.
Step 2: Apply enough cleaner
Follow the product label or your veterinarian’s instructions. For many veterinary cleaners, the solution needs to coat the canal rather than remain as just a few drops at the entrance. If your dog strongly dislikes liquid being poured directly into the ear, ask your veterinarian whether applying cleaner to a cotton ball at the opening is appropriate.
Step 3: Massage the base
Place your fingers around the base of the ear and massage gently for about 20 to 30 seconds, or for the time recommended on the product label. A soft squishing sound can mean the cleaner is moving through the canal and loosening debris. Use light pressure; the goal is to move the solution, not force it deeper.
Step 4: Let your dog shake
Move your face away and allow your dog to shake naturally. This helps bring loosened material toward the outer opening. Use the towel to catch splashes and wipe the outside of the ear flap if needed.
Step 5: Wipe only what you can reach safely
Use a clean cotton ball or piece of gauze to wipe debris from the visible folds and the opening of the canal. Do not push your finger, cotton, or gauze farther than you can comfortably see. Replace the material as it becomes dirty and stop if you see blood or your dog shows pain.
5. Check the result and decide what happens next
After cleaning, the ear should look less dirty and your dog should remain comfortable. A little temporary dampness from the solution is expected, but the ear should not become increasingly red, swollen, or painful. If you are cleaning before prescribed medication, follow the veterinarian’s instructions about how long to wait and which product to apply.
There is no universal cleaning schedule. Some dogs need only occasional cleaning, while dogs with recurrent problems may have a specific maintenance plan. Follow your veterinarian’s frequency recommendation rather than cleaning daily by default. Over-cleaning can disturb the ear’s normal protective barrier.
Common mistakes to avoid
- Cleaning an infected ear as though it were routine buildup: pain, redness, swelling, discharge, or strong odor should prompt veterinary advice.
- Using too little product: a few drops may not loosen material effectively, but always follow the label and veterinary directions.
- Scrubbing aggressively: vigorous rubbing can damage already irritated skin.
- Using cotton swabs inside the canal: they can push debris inward and cause trauma.
- Plucking ear hair without guidance: hair removal is not automatically helpful and may create inflammation in some dogs.
- Cleaning immediately after every bath: prevent water from entering the canal instead of repeatedly washing ears that do not need it.
What if your dog will not cooperate?
Return to short, reward-based handling sessions. Start with touching the shoulder, then the ear flap, then the bottle near the dog without applying anything. Keep each session brief and end before your dog becomes tense.
If your dog snaps, panics, or appears painful, stop. Do not attempt to overpower the dog or continue through severe resistance. A veterinarian or qualified groomer can help you create a safer handling plan, and a painful ear should be examined rather than repeatedly cleaned at home.
Safety checklist before and after cleaning
- ☐ The ear was checked for pain, swelling, discharge, and odor first.
- ☐ The cleaner is intended for dogs and is appropriate for your dog’s condition.
- ☐ Cotton swabs and pointed tools stayed out of the ear canal.
- ☐ The ear was massaged gently, without force.
- ☐ Loose debris was wiped only from reachable areas.
- ☐ The dog remained comfortable throughout the process.
- ☐ The ear was monitored afterward for worsening redness, pain, or discharge.
When to contact a veterinarian
Arrange veterinary care if your dog has persistent head shaking, repeated scratching, a foul or yeasty odor, swelling, marked redness, bleeding, dark or pus-like discharge, or pain when the ear is touched. Seek prompt advice for head tilting, loss of balance, facial weakness, or unusual eye movements, which can indicate deeper ear involvement. Merck Veterinary Manual’s guidance on ear disorders describes these symptoms and the need to identify the cause.
Do not use leftover medication from a previous ear infection unless your veterinarian tells you to. Different infections can look similar but require different treatment, and some cleaners or medications are unsafe if the eardrum is damaged. The American Kennel Club’s ear-cleaning guidance likewise recommends veterinary-approved products and stopping when an ear appears painful.
Your next actions
- Inspect both ears today in good light and note any odor, redness, moisture, or discharge.
- If the ears are comfortable and only mildly dirty, purchase or use a dog-specific cleaner recommended by your veterinarian.
- Practice touching the ear and rewarding calm behavior before attempting a full cleaning.
- Clean one ear at a time using the gentle sequence above, then reassess your dog’s comfort.
- Write down how often buildup returns and share that information with your veterinarian if the problem becomes recurrent.
Safe dog ear cleaning at home is mainly about restraint, product choice, and knowing when not to continue. If the ear is comfortable and only mildly dirty, a calm veterinary-approved cleaning can be appropriate; if there is pain, inflammation, discharge, or a strong odor, a veterinary examination is the safer decision.
Pingback: German Shepherd vs Belgian Malinois: Which Dog Is Better for Your Lifestyle? – LaokPet